Sunday, June 17, 2012

Jumpers - just a little daggy!

In theory, these are the perfect jumpers for me. The colours are pretty, the style is perfect for layering under my new coat (most of the jumpers I have have interesting necklines and  just don't look right when the buttons of the coat are closed. Like this or this.) These new jumpers sewed up pretty good too, since they are just like a t-shirt. But without any interest, the are even boring to me and I like dressing simply.

The red is possibly some type of wool blend. I bought it 10+ years ago when I was at university and like travelling to fabric stores all over Brisbane. This particular place was in someone's garage, I swear. I think this was the only piece I actually bought at the time because I wanted to visit some other places in the area. The pattern is a vintage Kwik Sew pattern, 742 but I omitted the turtleneck (they say cowl neck) and added a self-fabric neckline.


The red version wasn't scooped enough, so my second version was scooped a little more with the Jalie 2806.

Maybe they will grow on me.

Friday, June 15, 2012

The 60s style coat - part 2: the one with the confession

I had also planned to use the lining material for the under collar but then because the lining fabric is so thin and fragile and a pastel colour that a different fabric would be more suitable. The idea about using the lining was to tackle the bulk/turn of cloth issue, so I needed a thin-ish fabric. Lucky I have a stash because I found a black herringbone weave wool blend that was perfect. Hopefully I have enough to still  use that wool for its intended use (pants) otherwise I might have to see if there is more at my local fabric store.  
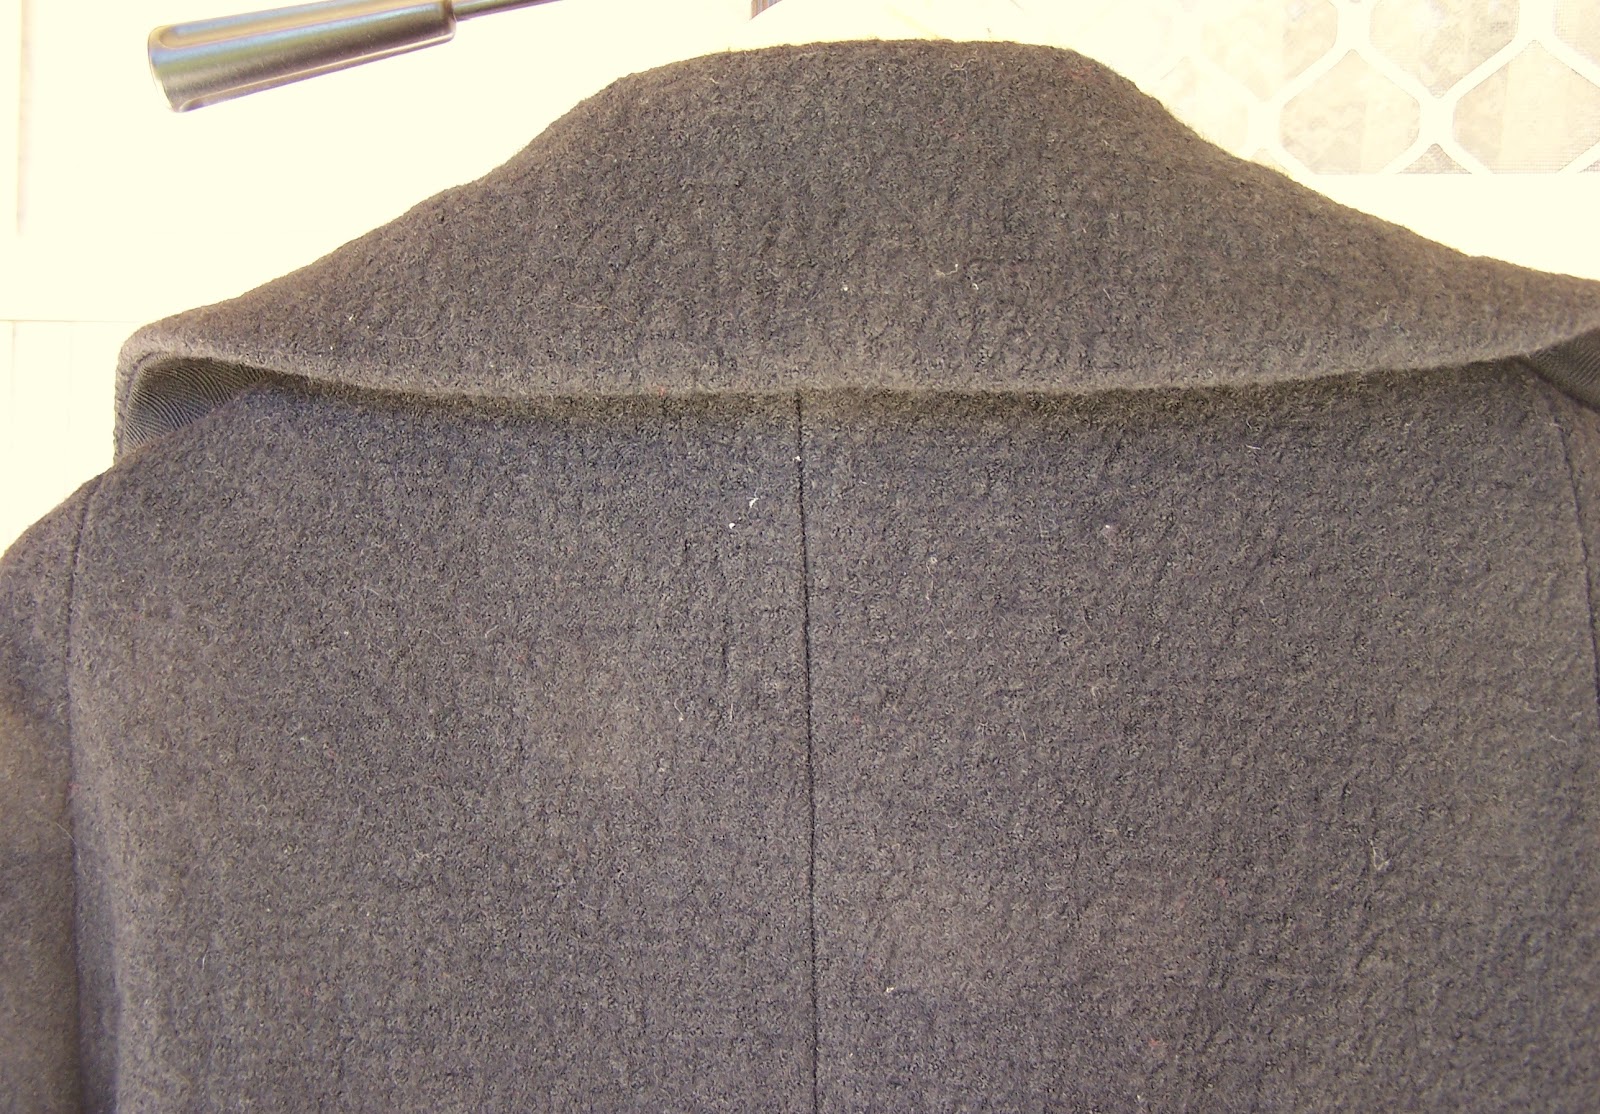
For turn of cloth, I removed about 1.2mm from the outer edge of the collar and 6mm from the edge that adjoins the collarband. The undercollar sits under nicely now that I have stitched-in-the-ditch around the collar/collarband seam. That seemed to stop it from puffing out and showing.

 
Since my sewing machine would not sew buttonholes through two layers of my thick boiled wool, I decided bound buttonholes would be the way to go. I did an average job on the front using Gertie’s windowpane method but made a right mess on the back. I got freaked out again and had the “bright idea” of cutting holes straight into the fabric and not doing proper window method with the square of fabric. Umm, bad move. Not only did the fabric want to stretch out of place, it wasn’t in the right position after all so I had to make the holes even longer. I nearly cried at my stupidity but managed to make it a little more presentable when I stitched the facing to the backs of the buttonholes. I really need to practice how to do the marking for the windows on the facing or try a different method or something because this is the second time I have had the experience of them not lining up.  I am thinking of doing bound buttons on my next blouse or skirt project so I can practice this skill. I think I also need to invest in some silk organza. Does anyone is Australia know of a good source?


I also had some difficulty attaching the lining. The fabric shell seems a lot longer than the lining. I attributed this to the boiled wool having more give than the lining. I had to ease the wool into the lining at times, but it all lots extremely smooth. I managed to rip a thin hole along the seam line when I was impatient with the unpicking, but I darned that area and sewed around it. Hopefully it will not be too fragile at this point.
For the hems and sleeves, I stitched in the ditch to tack the hems down, as well as some a couple of stitches here and there to stop the wool from moving. Since it was a knit, it likes to stretch.
The coat has managed to come together despite some difficulties. I experienced more drama than any other sewing project but I will wear it and that is all that matters to me at the moment.


Saturday, June 09, 2012

The 60s style coat - part 1

This project turned into a mojo killer. Perhaps it was the uninspiring colour. Maybe it was because I was so unorganised with the lining, buttons and notions that more than once I had to stop to purchase interfacing or buttons.  I know that it was a bigger project than I had anticipated. I forgot how time consuming coats/jackets can be. Sew some seams, stop and press those seams. Press the stitching, press it open on the inside, press it open on the outside. I would have to turn the iron on each time, as I don’t trust myself to remember to turn it off before I leave the house. The chances of a fire are slim, but I don’t like the idea of leaving appliances like that on.

The pattern is Burda 111-09-05. I have used before in a boucle.  It was a close call between that and pattern120-12-08 . On my list were pockets, collar with not lapels, set in sleeves and about 65cm in length. Each pattern has a few features from my list. I did consider morphing the patterns, and layed the traced pattern over the other coat’s pattern sheet but then laziness set in and I just decided to extend the older pattern and had the pockets from the other pattern. I decided I could live with the raglan sleeves and besides, they are way easier to sew in!
I lengthened the pattern by 10cm, as this is what I felt my boucle version was short by. I was going to sew the pockets in the lining fabric to reduce bulk, but then I remembered my current coat which has self fabric for the pockets and it is snugly warm to shove my fingers in on playground duty. The fabric I used is boiled wool. I thought I was ordering something pants weight and I don’t know whether the fault was mine or the ebay sellers but this has been sitting in my stash waiting to be sewn for a couple of years. I have discovered that boiled wool is perfect for in light showers, as the day we visted Cooly Rocks On to see the hot rods, there was numerous showers and the water stayed on top of the coat.

I will add some more detailed shots for part 2.